IMPROVED! Adjustable Size Wall Bed Frame Kit - FREE SHIPPING
IMPROVED! Adjustable Size Wall Bed Frame Kit - FREE SHIPPING
Couldn't load pickup availability
NEW! Now adjustable between Queen, Full and Twin!
Out of stock?? Email me! I size my batches per demand!
Freshl assembly instructions coming, but everything is marked and labeled, assembly should remain just as simple as before.
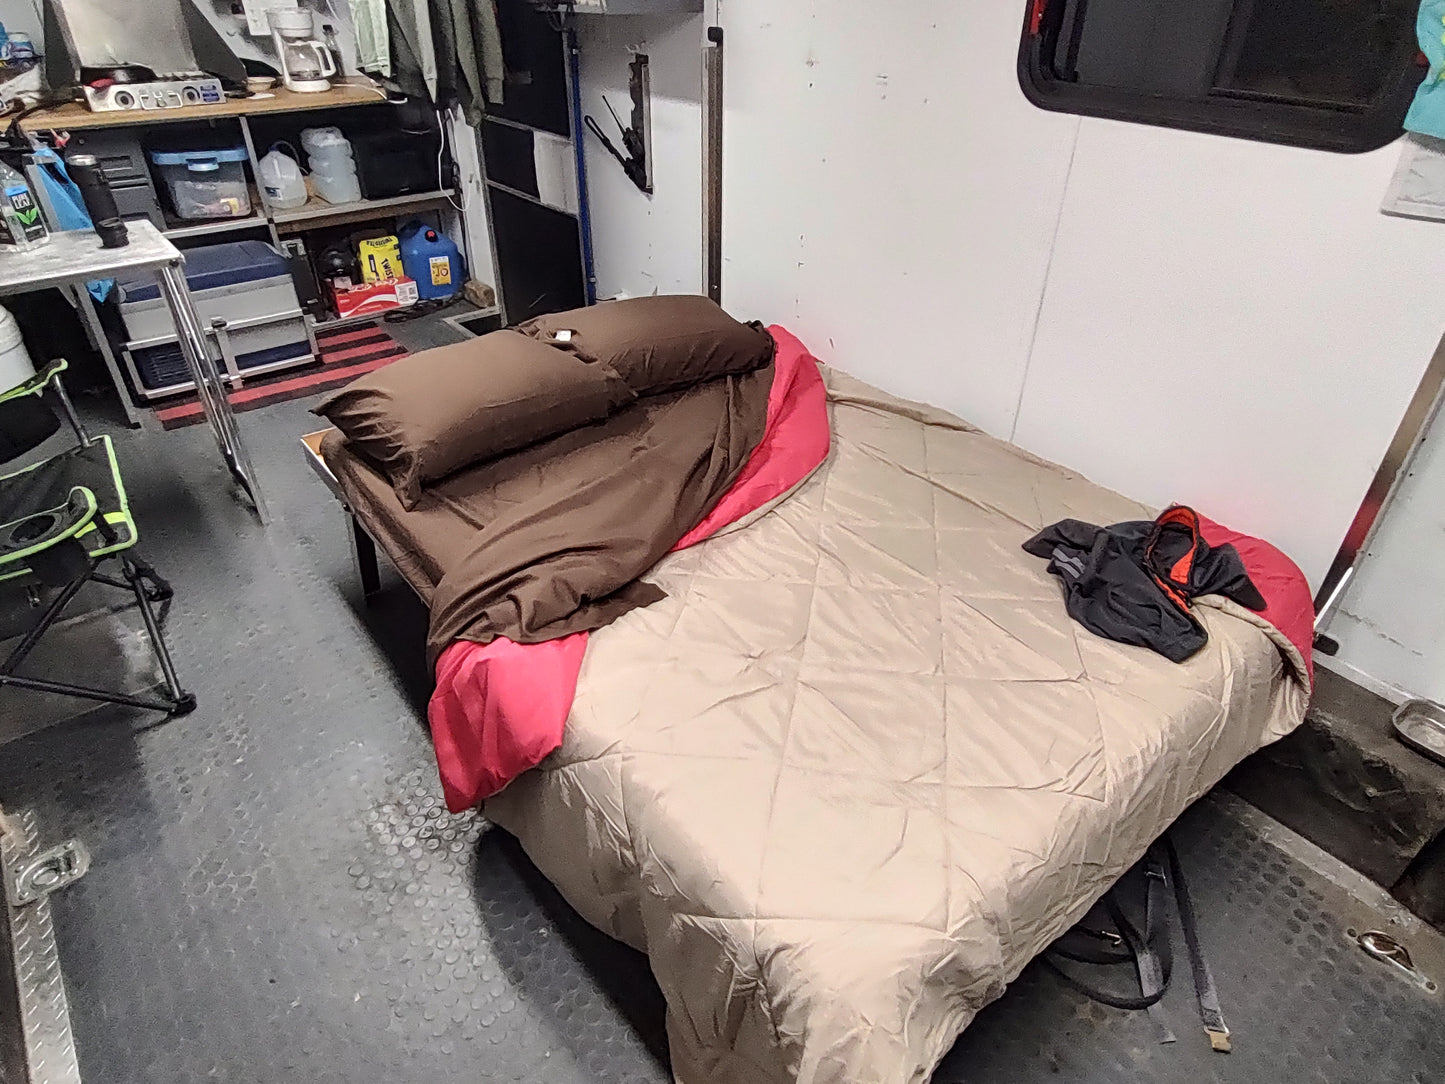
Get off the floor!
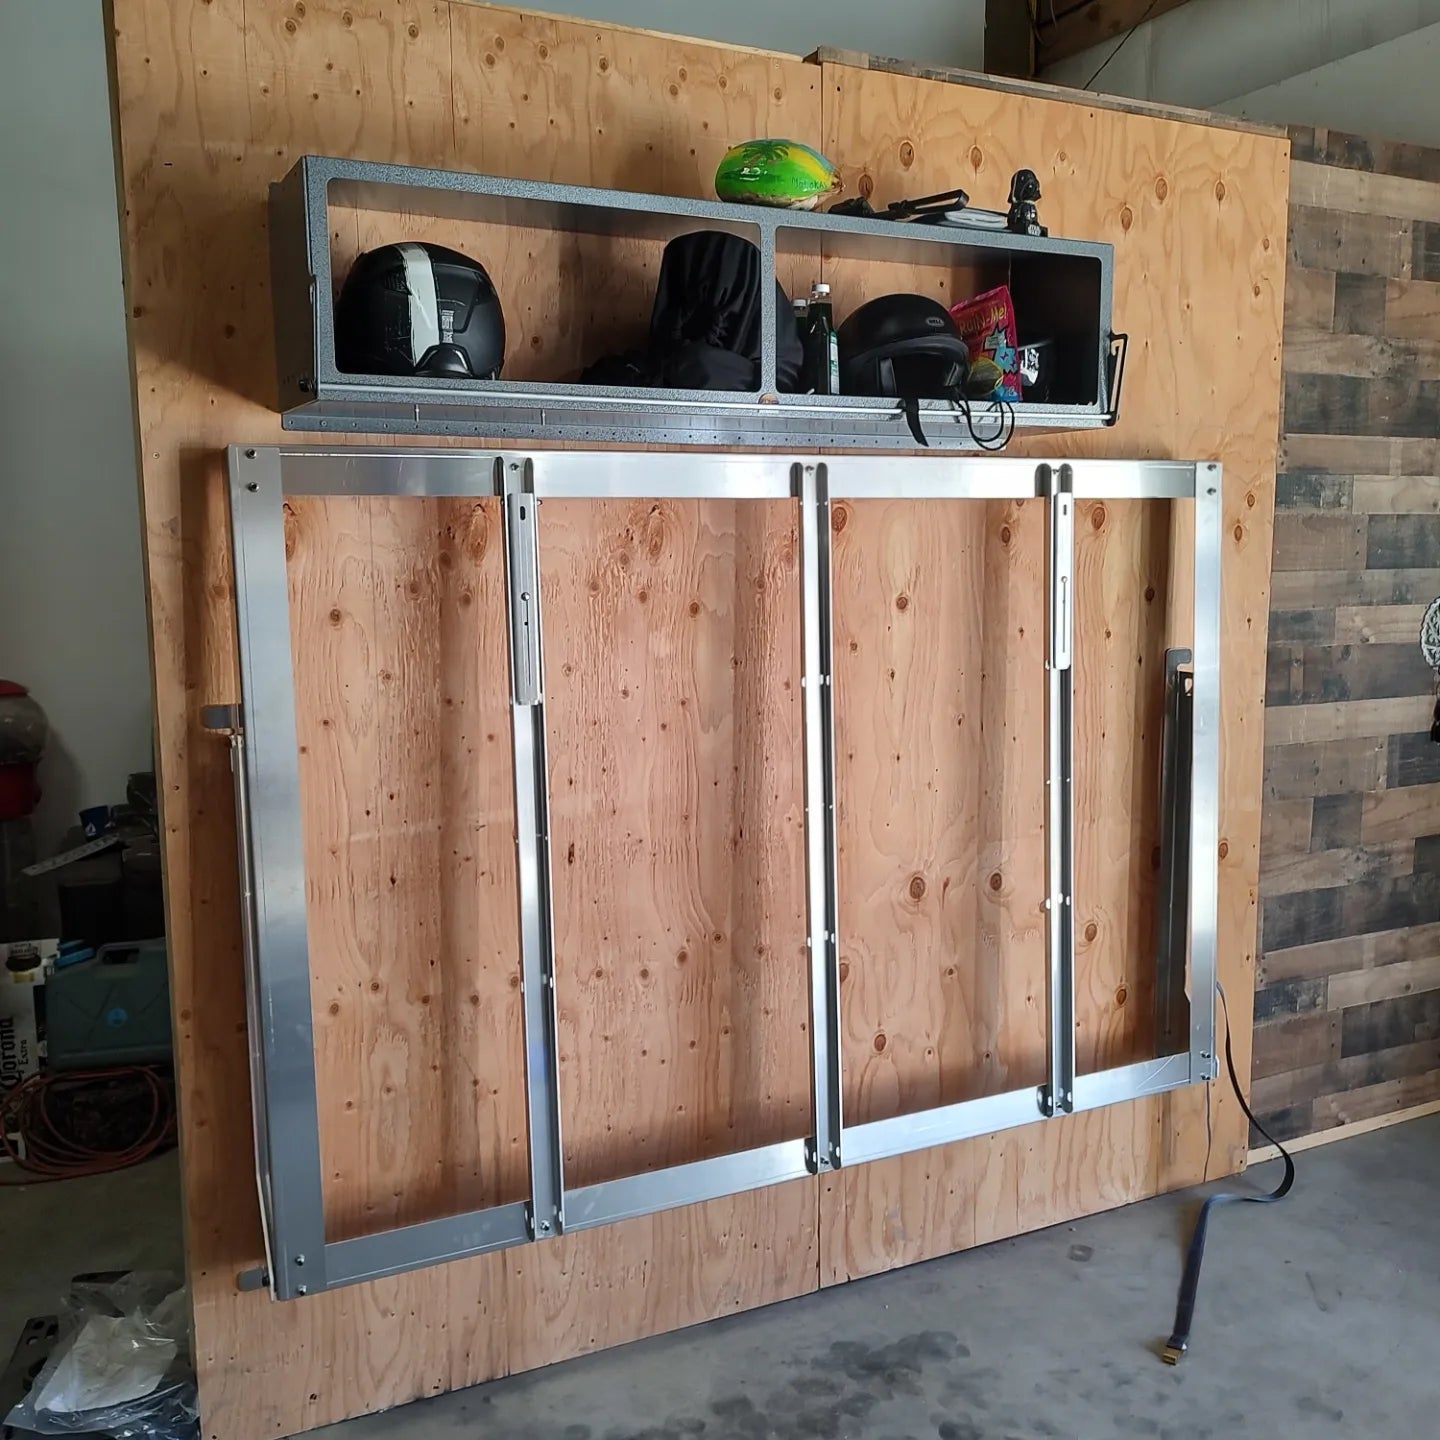
Lightweight, aluminum construction assembles in under an hour and attaches to your wall in only two places. No additional brackets, supports, shims, struts, etc.
The ultra lightweight construction(44 pounds dead lift, so 25-30 when wall mounted!)) means you wont need any lift assists. That means lower cost and less failure points.
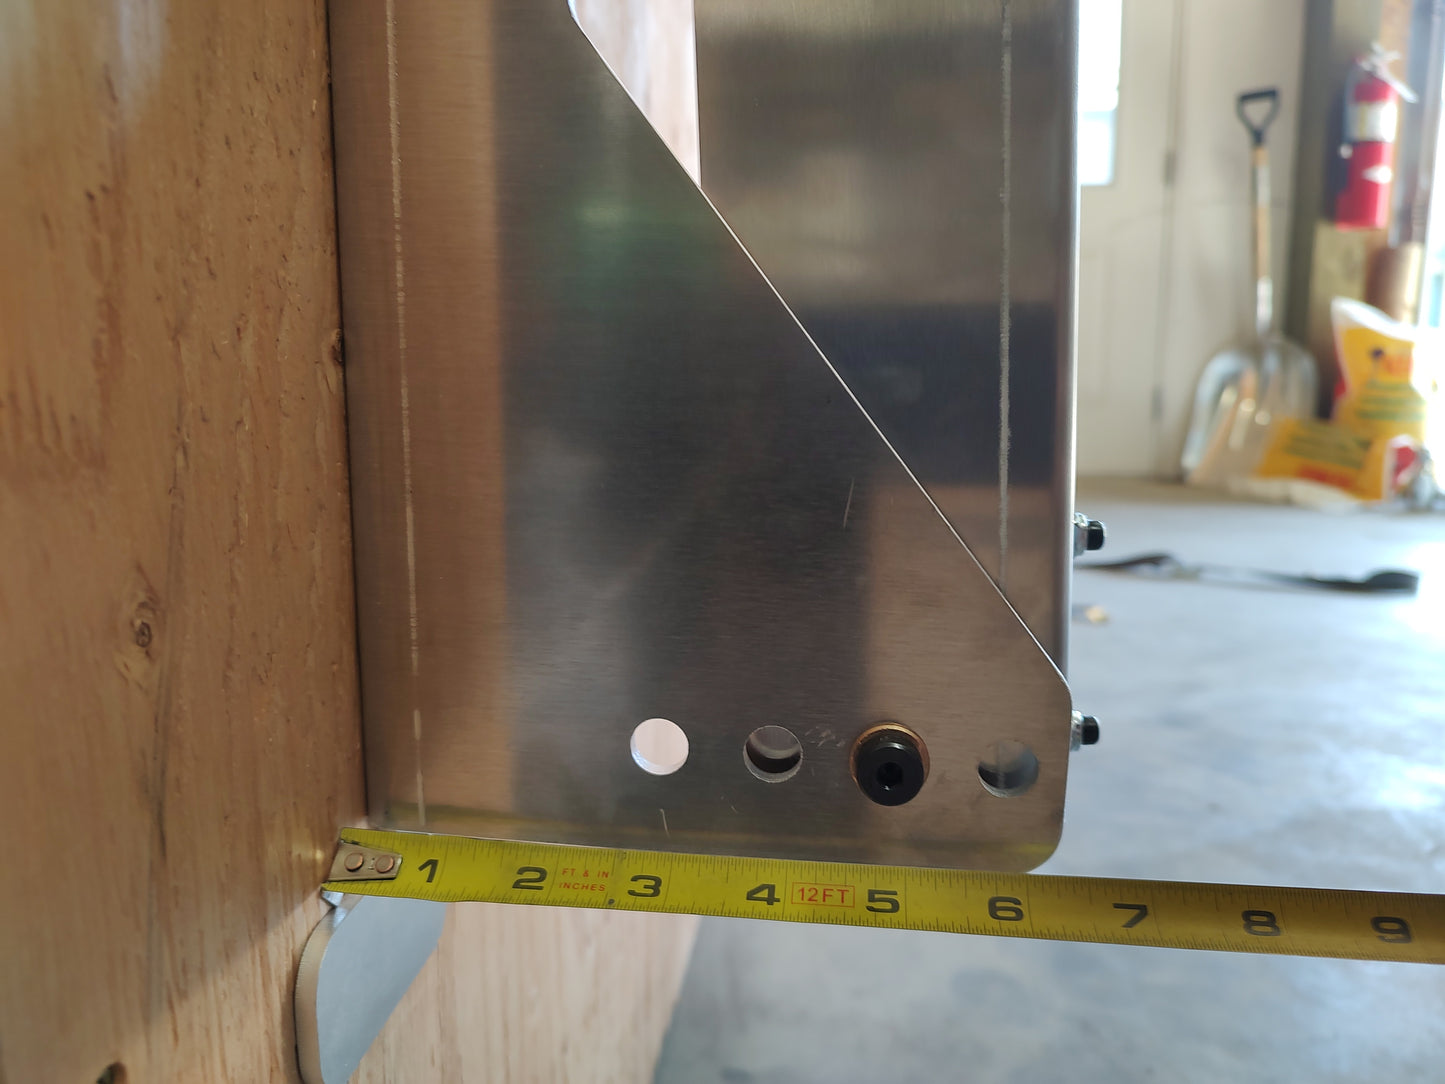
The mounting points are exactly 80" apart, designed for wall studs 16" on center.
Adjustable legs allow the bed to be mounted anywhere from 14 to 19.5" off the floor. They also allow for the beds to be mounted far back over a Hidden Dovetail portion or other non-even surfaces.
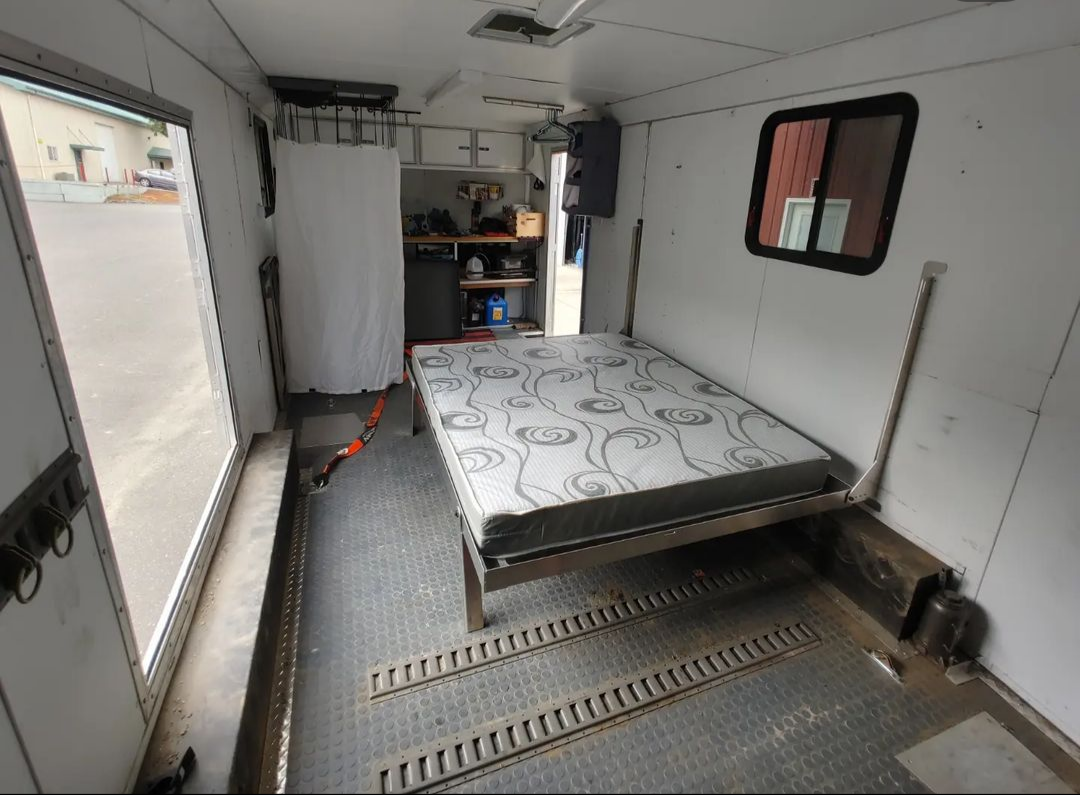
These frames were designed with a modern style "Bed-In-A-Box" style mattress from Amazon, etc to be used.
These WILL NOT fit a giant 14" thick Serta with gel foam topper, etc!
The frames have specific pivot locations to handle 6", 5" 4" and even a 3" mattress. The thinner the mattress the less it will stand out from the wall. Its even possible to trim the frame horns with a 3" mattress to get maximum room for wide toys.
Weight limits will be comparable to any other lightweight bed frame. Common sense should be applied here. For a few reasons I would suggest no more than 3 adults in one bed... Two large, happy, well-fed adults should be just fine.
The following dimensions are INSIDE dimensions. These are the max sizes of mattresses that can be used.
Queen setting: 80" Long, 60" Wide
Full setting: 80" Long, 54" Wide
Twin setting: 80" Long, 38" Wide
Max mattress thickness is 6" thick. HOWEVER... it may also be possible to run spacers between the wall and the bed kit wall mounts...this will be on you to figure out, but I will offer any input/advice/ideas that i can.
You will need to put some type of support under the mattress, most, including myself, use 3/8" plywood.
Installation:
Level the trailer for easier install using a level for the wall mounts.
Tools required/suggested: Cordless impact driver, nut driver bits(or small socket set) Cordless drill & 1/8" drill bit, 1" blue tape, sharpie, strong magnet, 1/2" wrench/socket, 7/16" wrench/socket, 3/16" Allen wrench.
Use the magnet to locate wall studs. Find the center of the stud at a low and high point, run the tape over these marks. Now measure 80" over, repeat. ENSURE THAT 80" IS AGAIN ON CENTER! Do NOT drill any holes until this is confirmed!
Keeping in mind the mattress/frame also need to clear the ceiling and any cabinets above, decide how high you want your bed to sit. The legs will determine the Min/max height settings other than the ceiling clearance. 14" being the lowest, 19.5 being the highest. THIS IS TO THE FRAME. Add your mattress thickness to that measurment before deciding.
For explanation purposes, lets use the minimum height of 14" to the bottom of the frame.
Minimum height setting install:
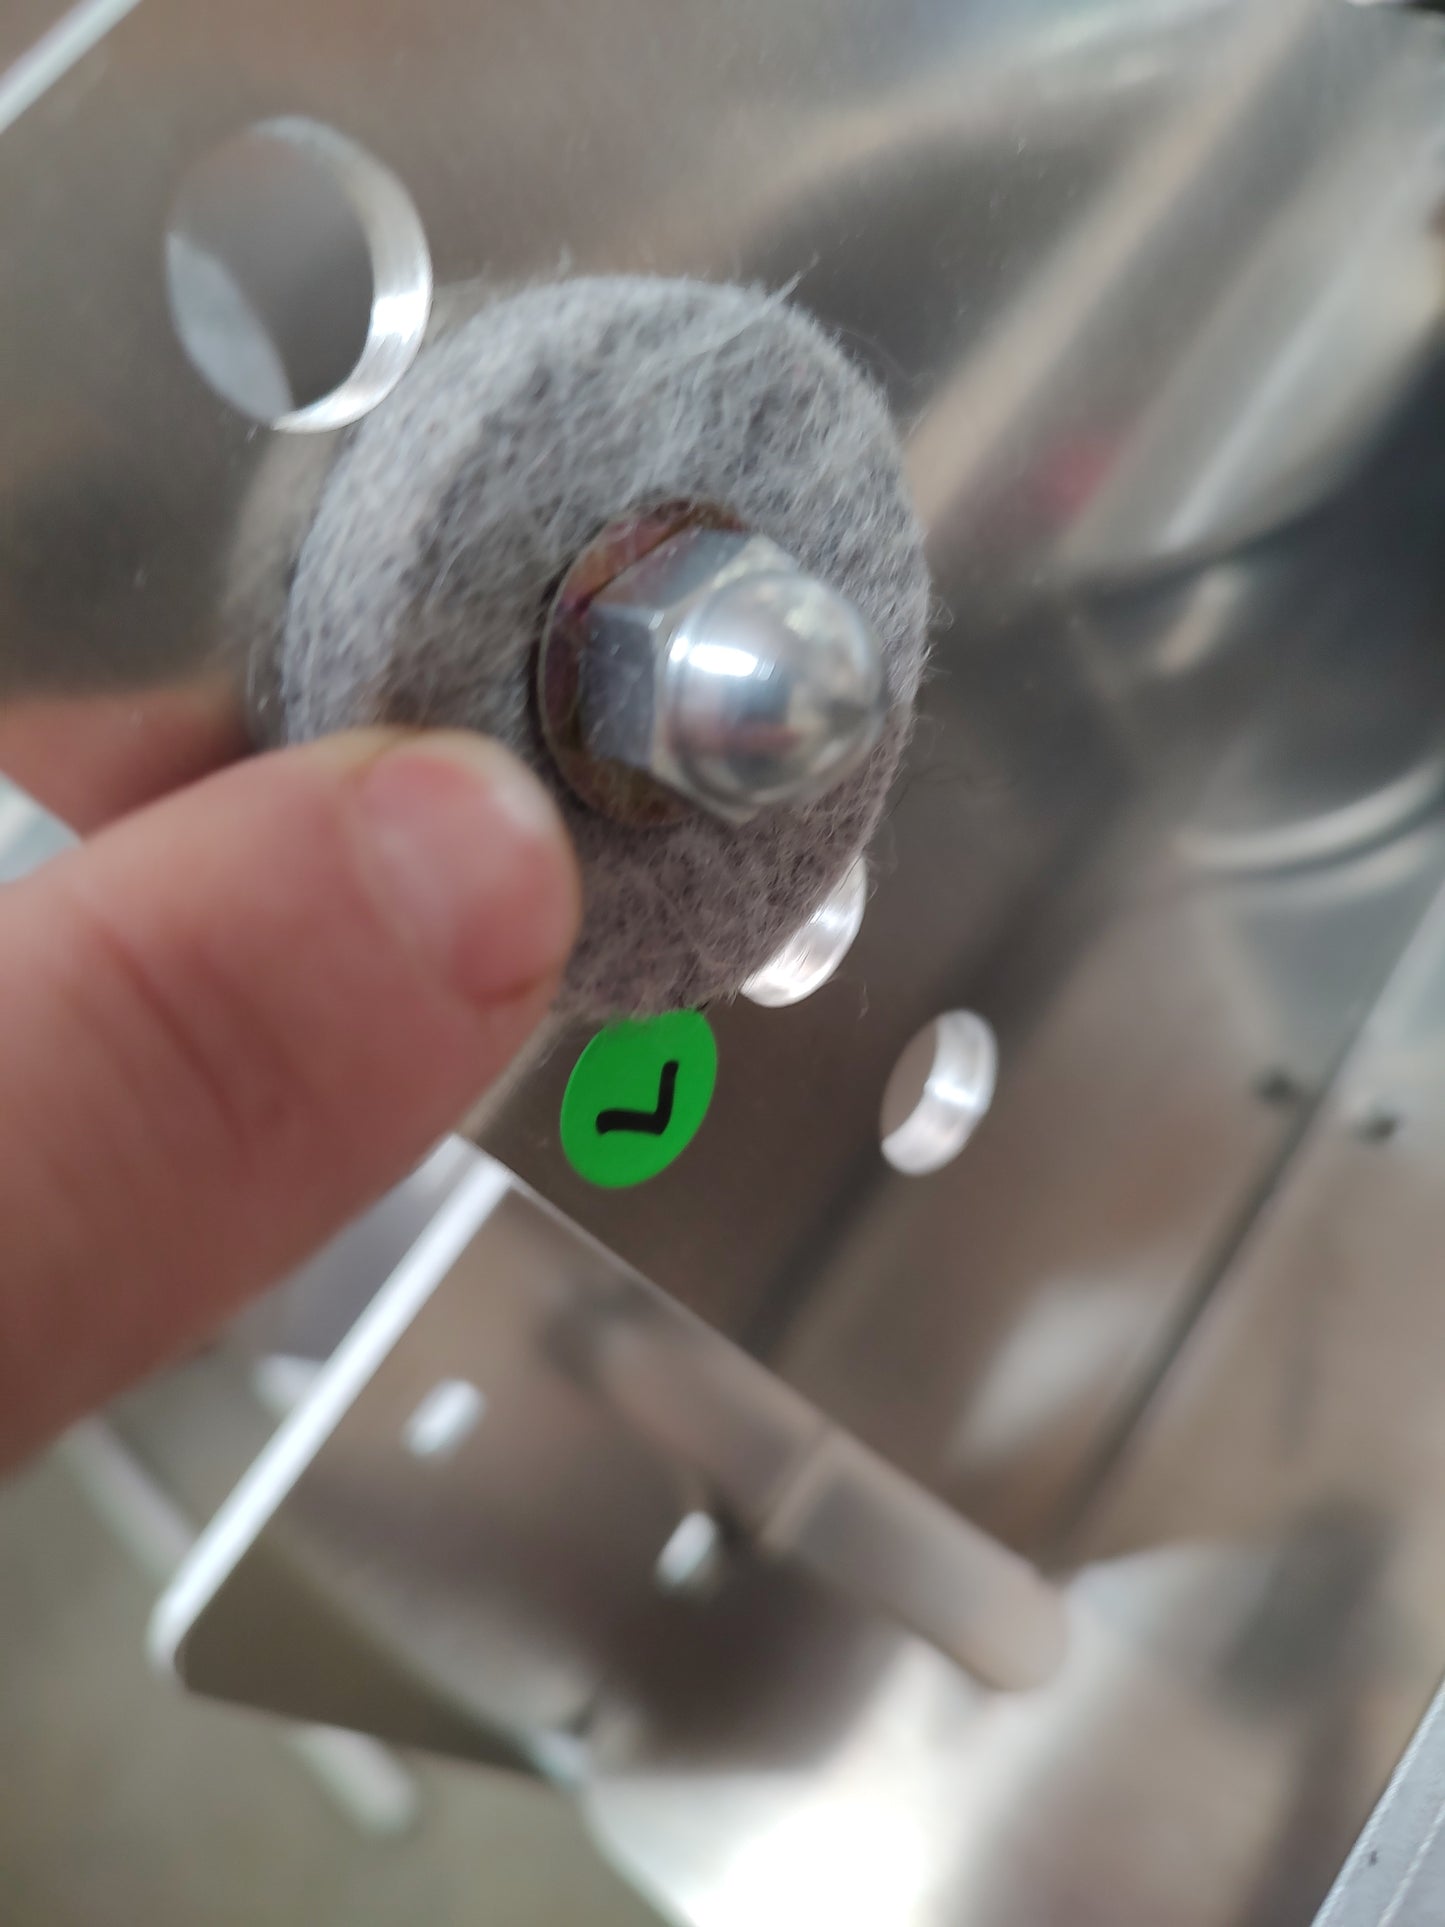
Make a mark at 16" from the floor on each blue tape. Drill a hole with the 1/8" drill bit. Locate the left and right wall mounts from the kit, They will have "L" and "R" on the green stickers. Green stickers face "in" or towards each other once mounted. Attach to the wall with an included Self-Tap screw in the top mounting hole, allowing you to level it
DO NOT OVER TIGHTEN!. It is easy to strip the wall studs.
Now adjust so the bottom hole is centered on the tape, drill, screw, repeat for the rest, as well as the other side wall mount.
Max Height Setting:
If you have enough ceiling height, the first hole location can be as high as 21.5" from the floor. And of course, any height in between there is good to go.
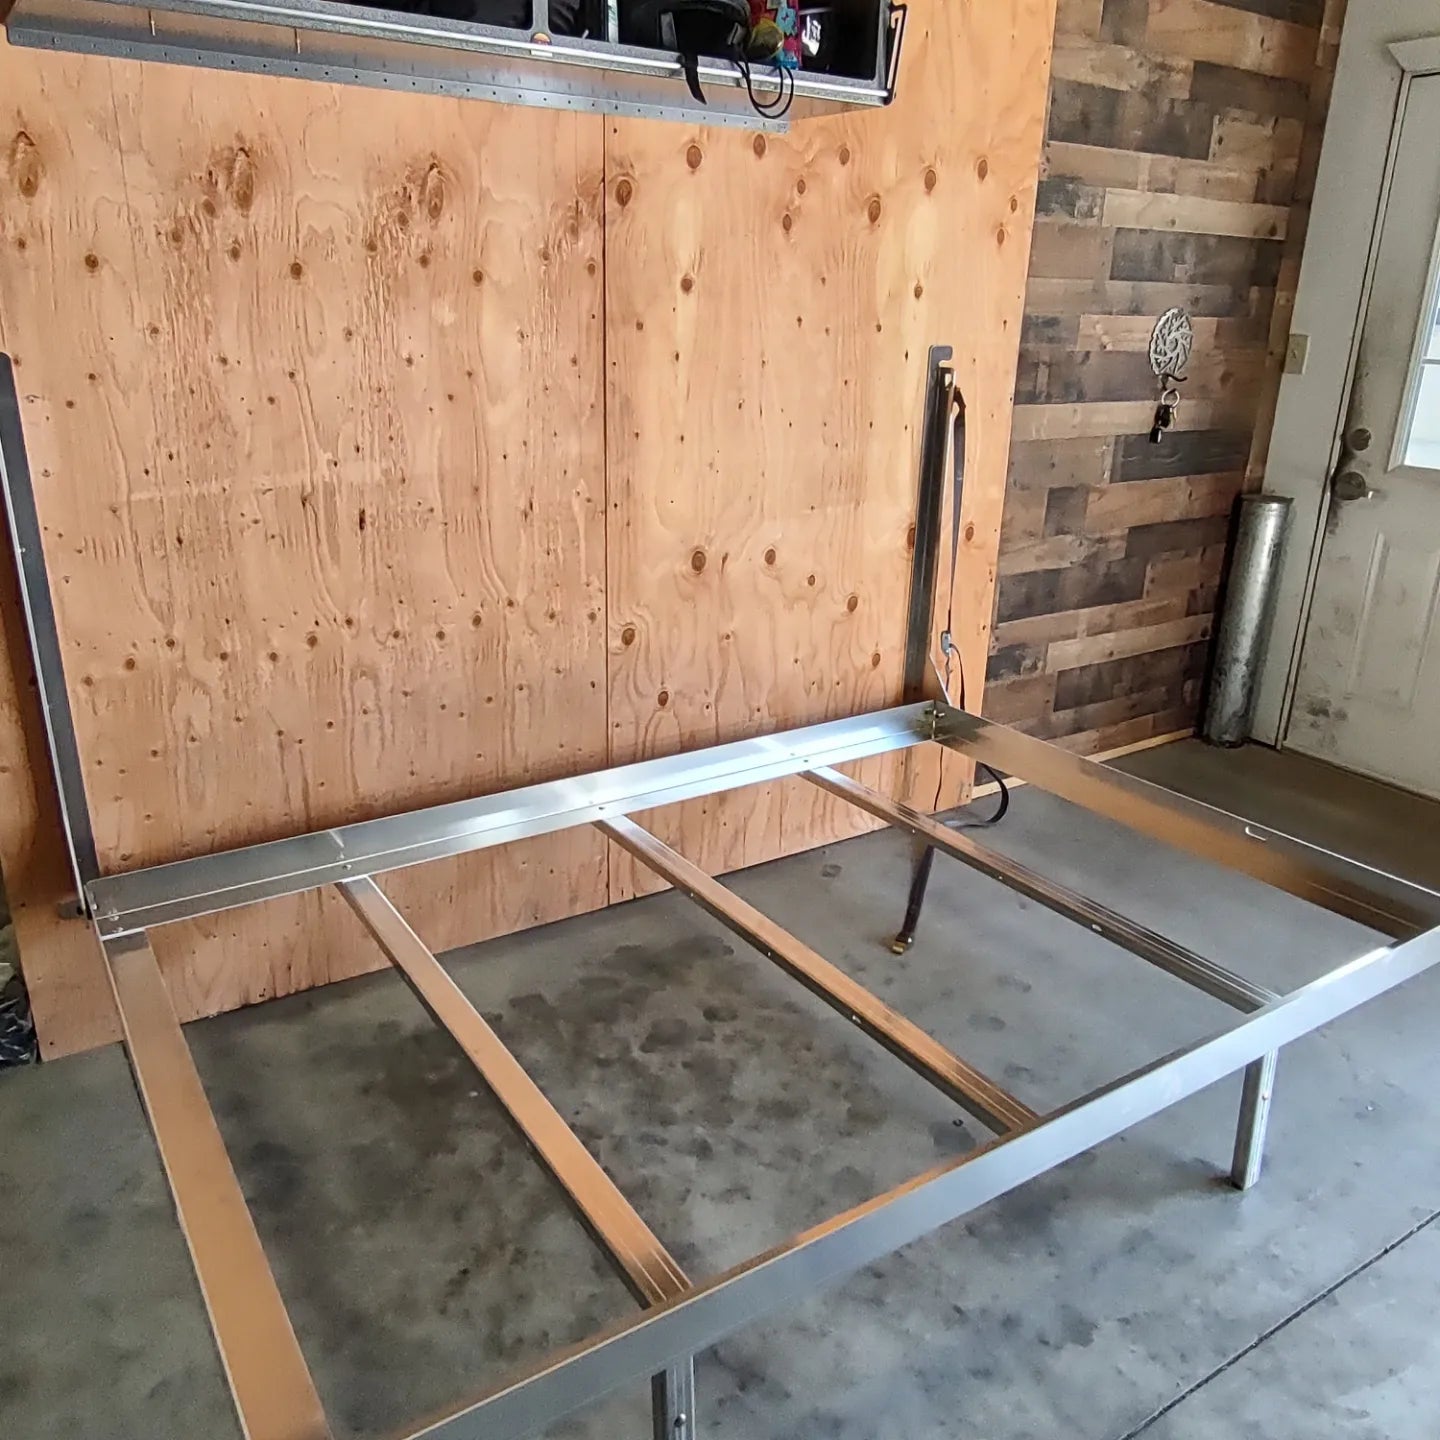
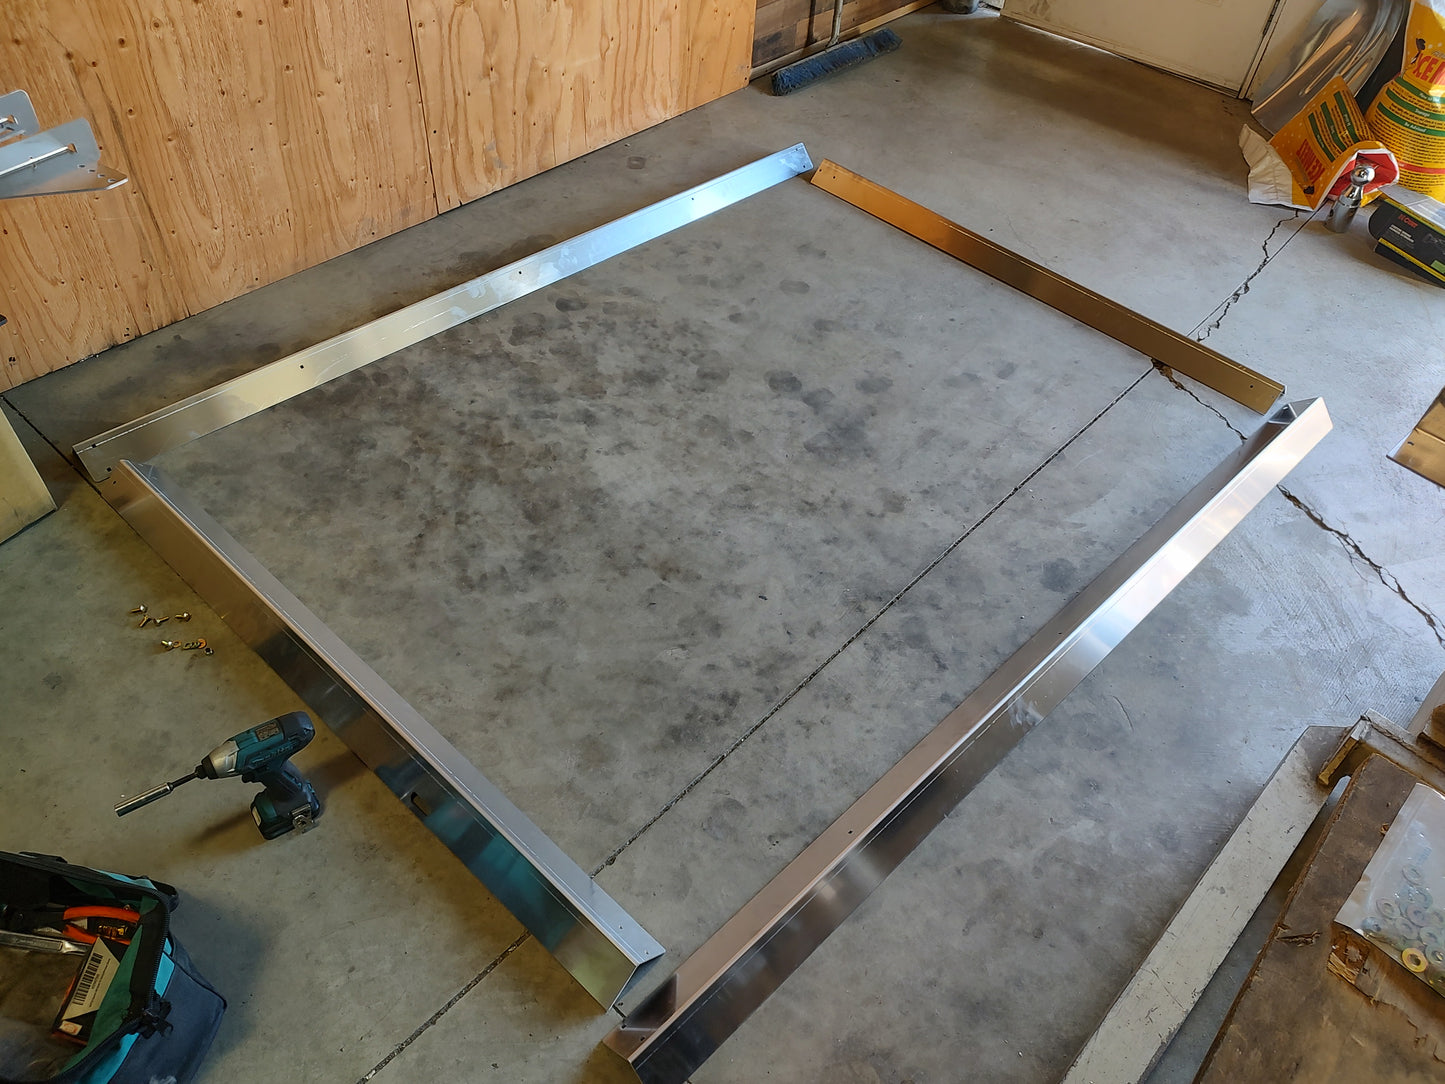
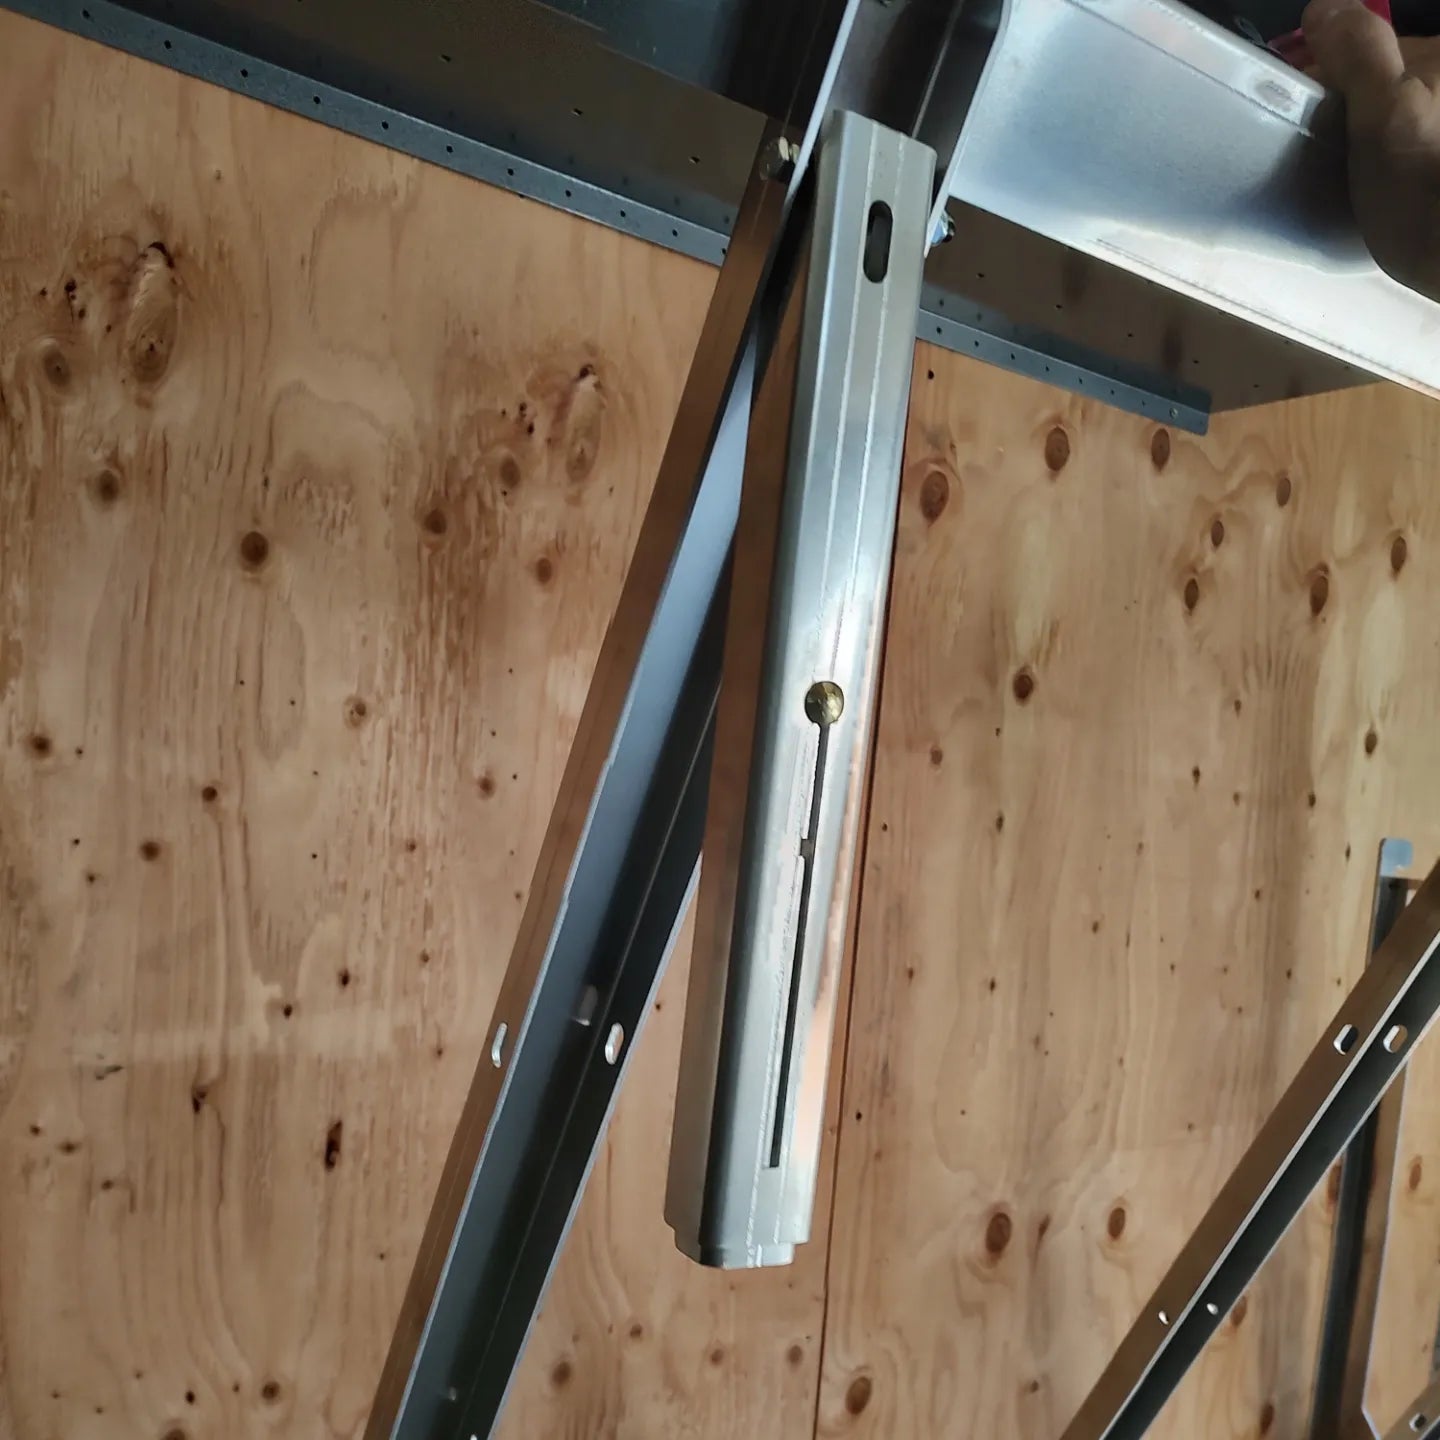
Assemble the frame.
This will be easier to assemble upside down.
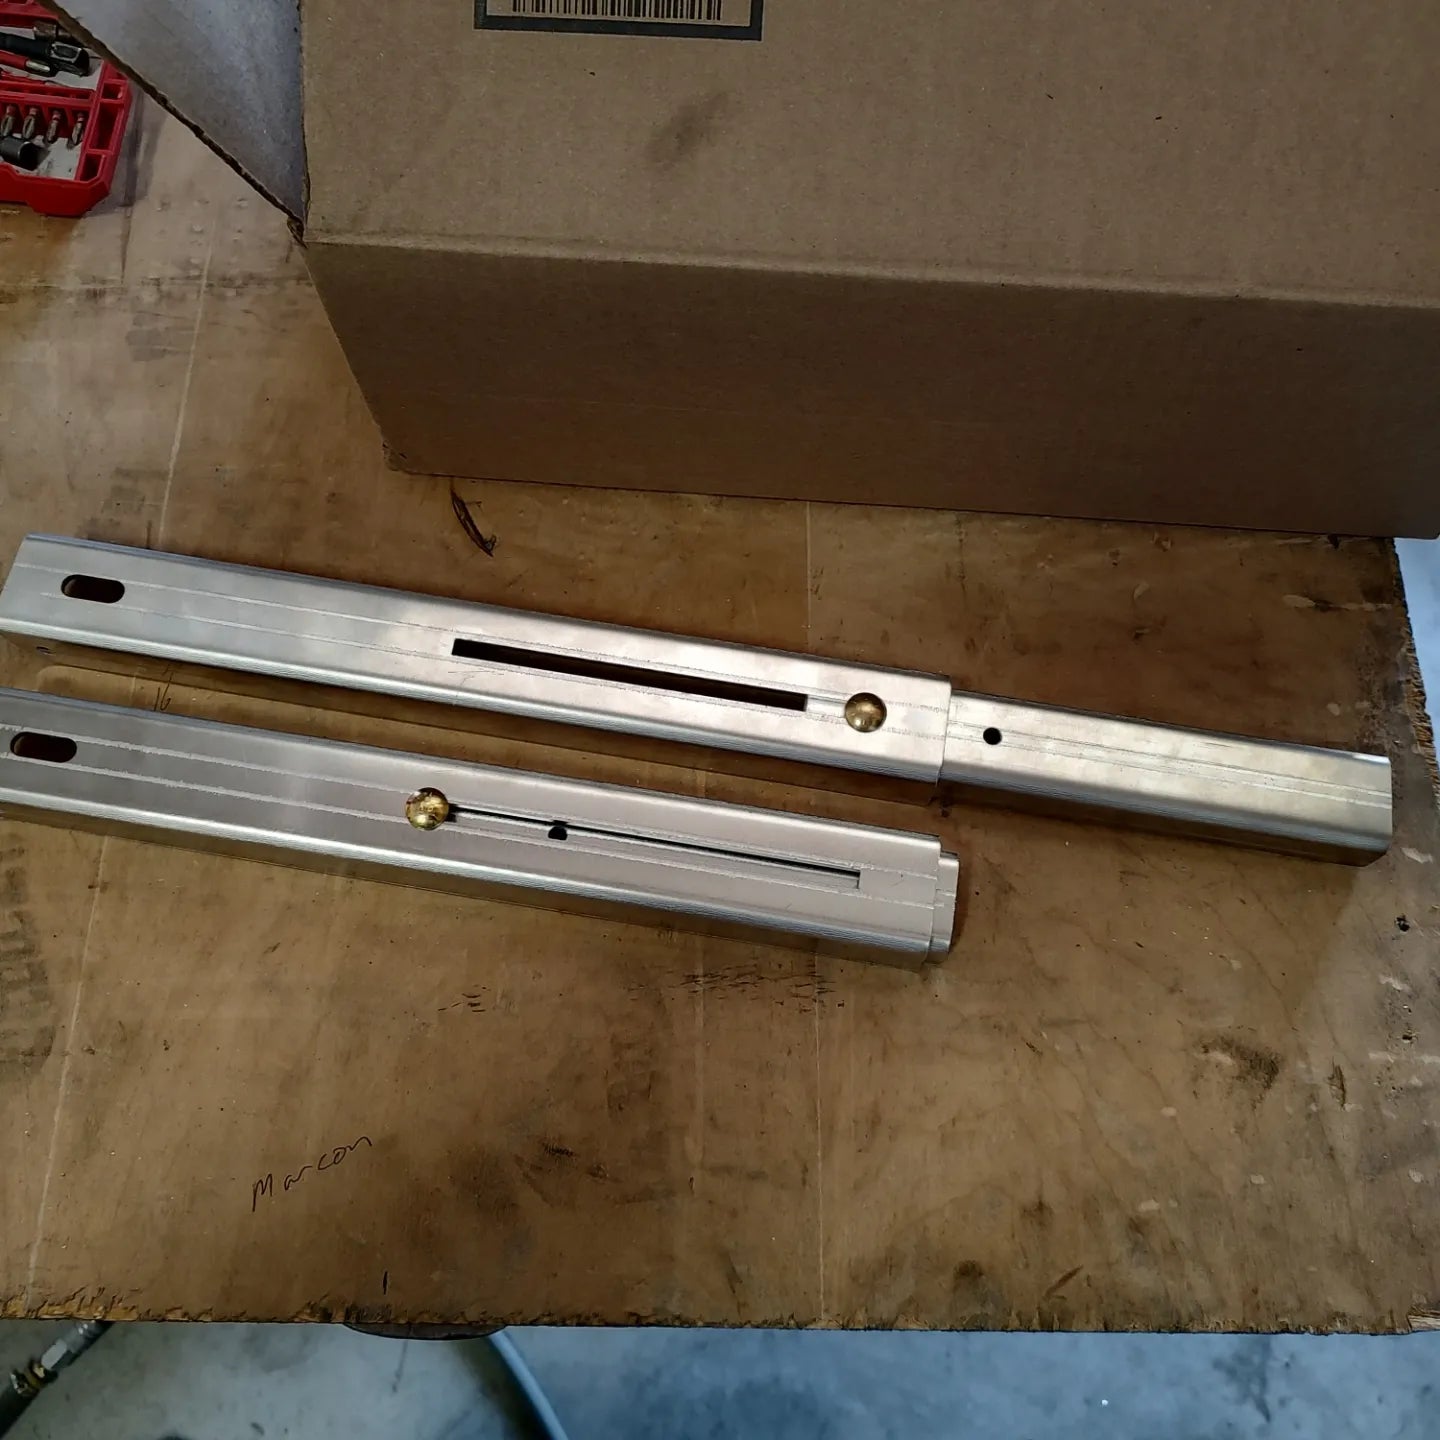
Note parts groups as "Ends" and "Sides." The "ends" are adjustable, the "sides" are all the same length. Simply slide down the length of each other until desired size(Queen, Full, Twin.
ASSEMBLE THESE FIRST.
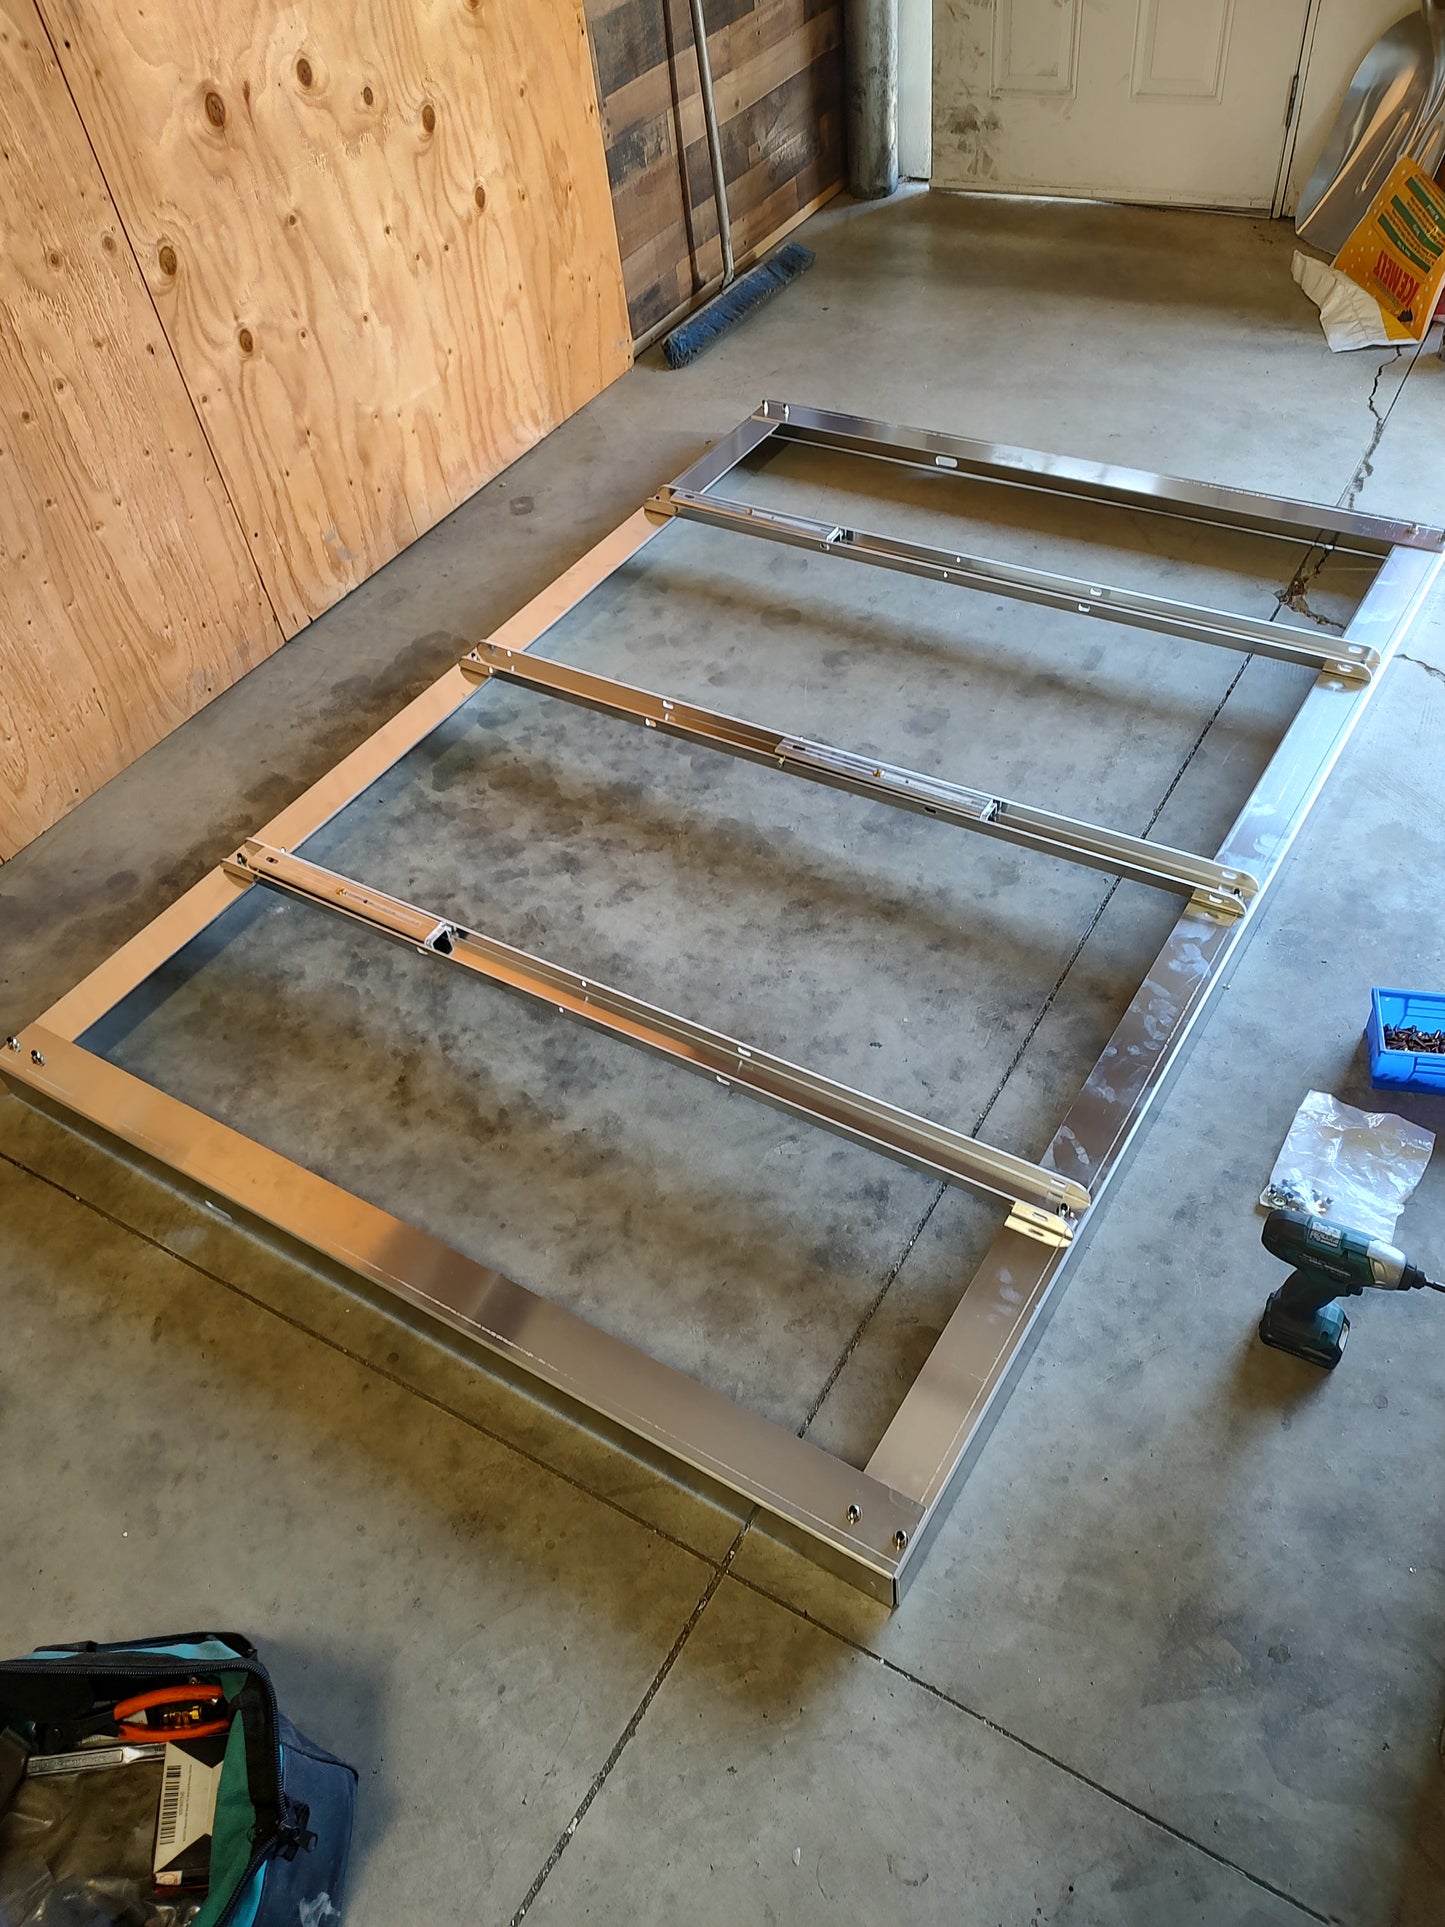
All other parts will sit "on top" of these. You will also note scribe marks for your chosen matress size, as well as colored dots in some areas.
Match up the colored dots. the dots will face each other, but basically, all of the round head carriage bolts will install through the square holes, from the mattress side of the frame up

Note that the center supports have legs in them, When up right against the wall, the legs will be hanging from the top. As you lay the frame down, the legs will swing into place. Tap outward with a toe to ensure they are in the forward position.
Again, all hardware will insert through the square holes, from the bottom up. insert bolt, align square head with square hole, place a washer and locking nut on each, tighten them up just enough to hold them together and keep the square head engaged in the square hole. Do not tighten yet. 
Install all hardware until you have a floppy, rattling bed frame. This will be annoying to work with, I know.
If you have a second set of hands available, this would be a great time to grab them, but manageable without.
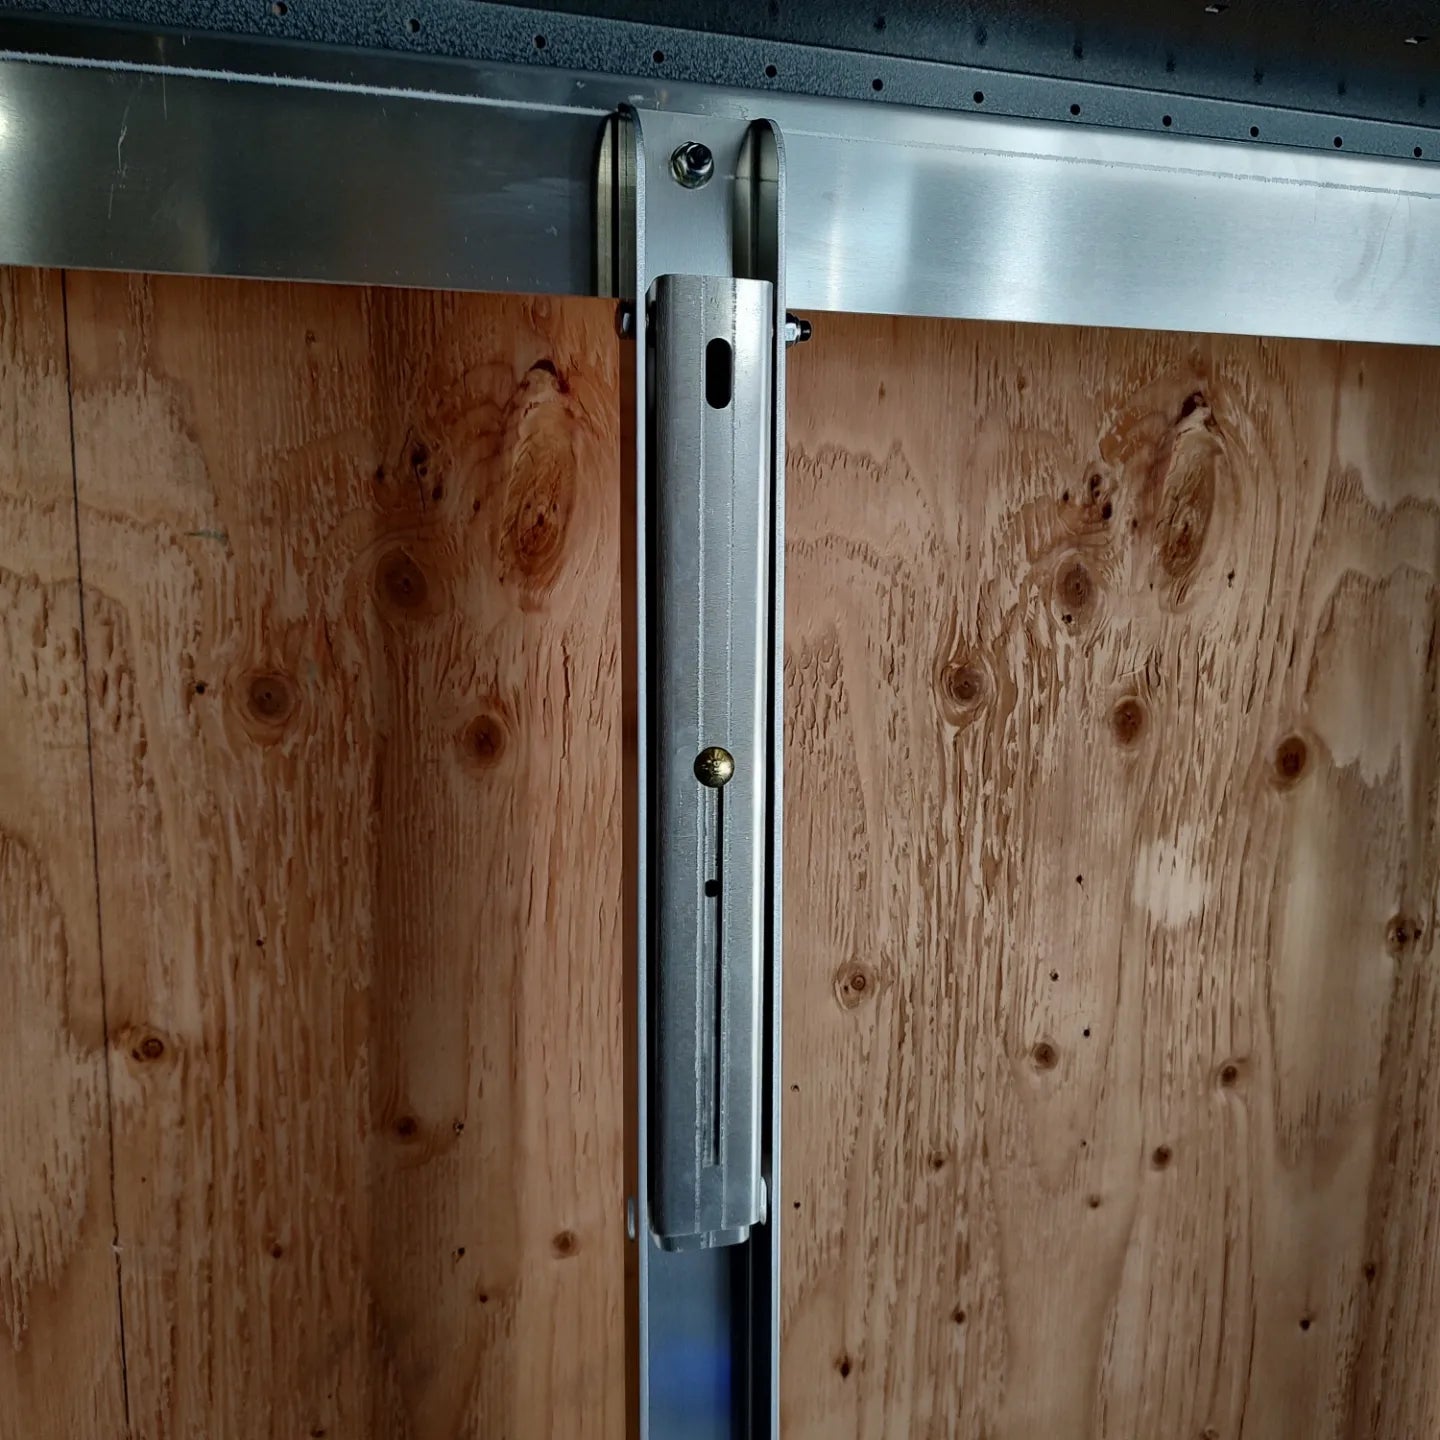
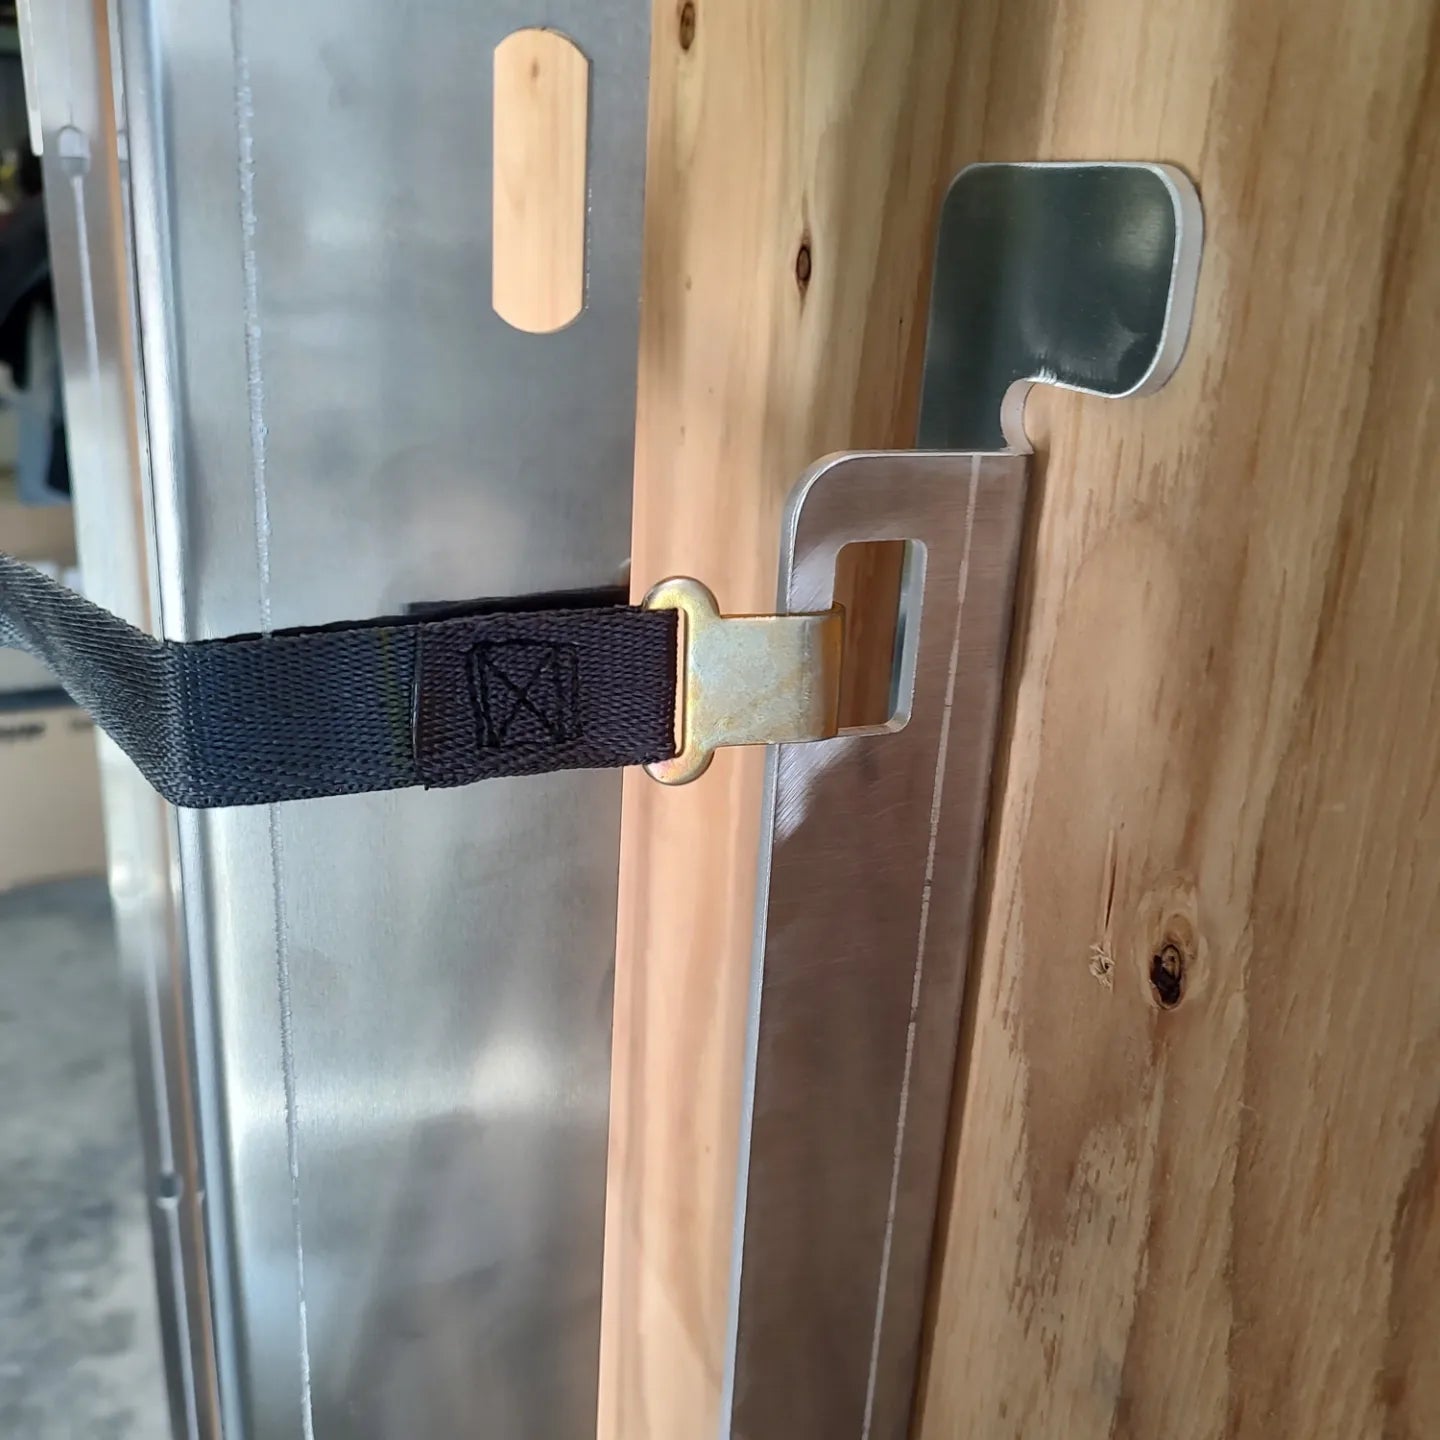
There will be a single hole on the outside of the "ends." This the pivot mount. The frame sits between the wall mounts,
Choose the mattress thickness pivot location. If you bought a 5" mattress, use the hole 5" from the wall, etc. 
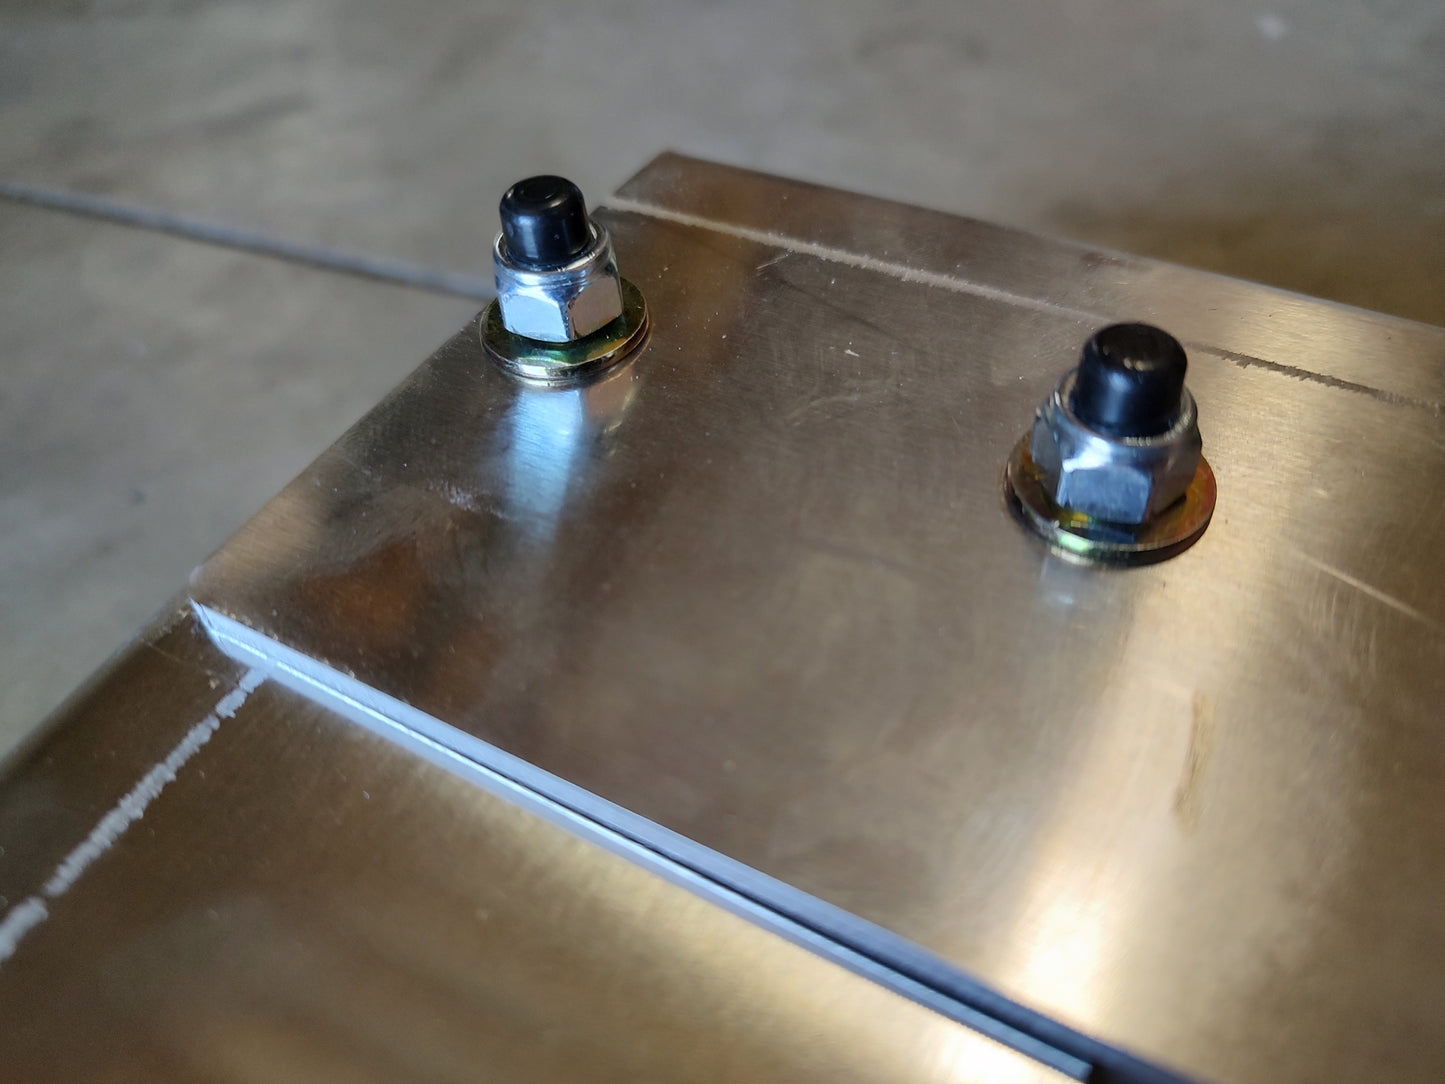
Remove the Cap nut and washer from the pivot bolt. These come shipped in the 5" mattress location. Move the pivot bolt and bronze bushing into correct location for your mattress thickness. These should press in lightly, it may take some light tapping with two wood blocks, etc.
ONLY the wool/felt washer will go BETWEEN the wall mount and the frame. Install washer and nut on inside, snug up tight. Repeat on other side.

Now flip the frame up against the wall. compare each side to the wall mounts and ensure that they are square and aligned, then begin tightening all the bolts. No need to overdo it, but they should be snug and tight. 
Youll want some form of backer for the mattress, plywood usually wins here for its availability and affordability. I suggest cutting the wood backer into two long pieces, with the split down the middle lengthwise, versus two larger squares with the split in the middle.
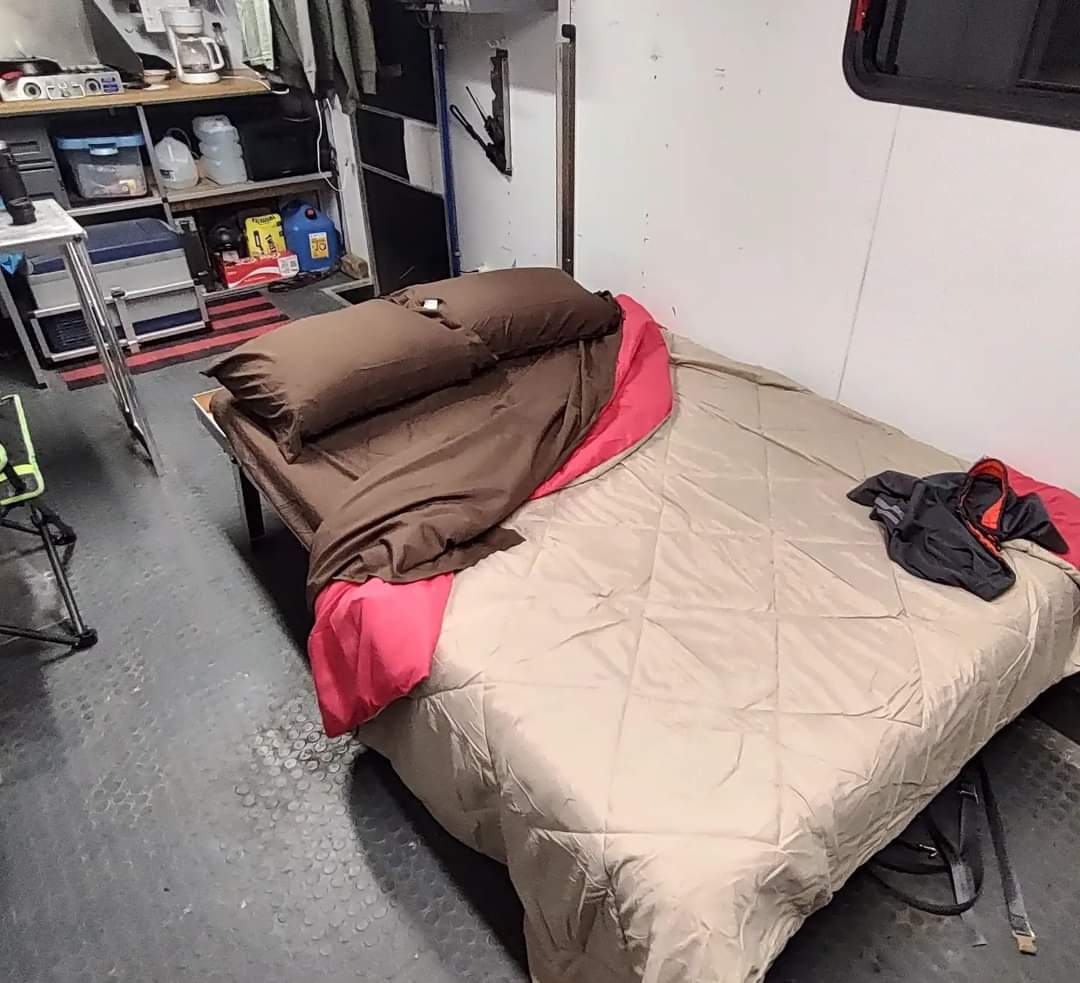
Throw your mattress on the bed. If you didnt get the XL versions of your mattress, you'll notice you have either a great place to put your phone, book, shoes, etc by your head or at the other end near your feet. This is possibly my favorite part!
Included are two straps. one holds the mattress and the bedding to the frame, the other holds the frame to the wall. 
When upright youll see some unused slots in the mattress supports. These can be used for a folding cargo net, etc while both up and down.